
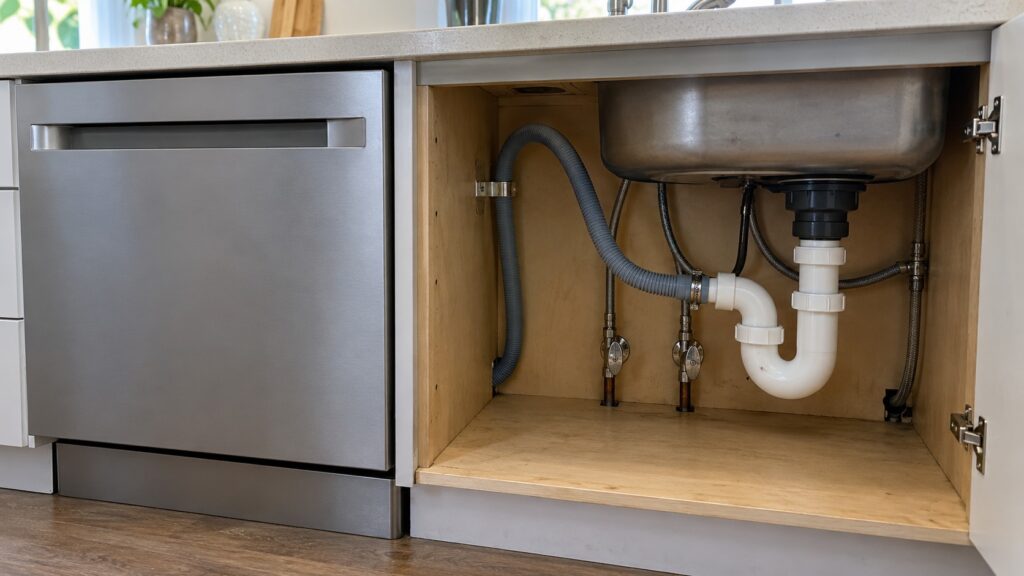
The Fisher Paykel dishwasher drain hose and the water supply are the two connections that decide whether a new DishDrawer installation stays dry. The drain hose carries used water out of the drawer to the sink drain or the disposal, and the supply line brings water in from a shut-off valve nearby. This guide explains how the connections are laid out, what a good drain route looks like in general terms, which mistakes cause leaks and slow drains, and which parts of the job are for the installer rather than the homeowner. The exact hose routing, fittings and measurements for your drawer are in the installation instructions that came with it.
How does a DishDrawer drain hose connect?
A DishDrawer is a drawer-style dishwasher, and our guide on how a DishDrawer works explains the wash action. For installation, what matters is that used water has to leave the drawer through a drain hose that runs from the pump to the household drain. The hose passes through the cabinet space beside or behind the drawer and ends at the sink drain, the garbage disposal inlet or an air gap fitting. The route has to be clear, supported and free of kinks for the drawer to drain properly.
Our dishwasher installation requirements guide describes the drain options for Fisher & Paykel dishwashers in general: an air gap, a high loop and a direct connection to the disposal. Which of them the DishDrawer installation instructions allow for your drawer is for those instructions to say. An air gap is a fitting on the countertop or sink that connects the dishwasher drain to the sink drain and is required by code in many places. A high loop raises the drain hose as high as possible under the countertop and secures it with a bracket, which helps prevent backflow without an air gap. A direct disposal connection joins the hose to the disposal inlet, and a new disposal may need its knockout plug removed first. Which option your kitchen must use depends on local code, so ask the installer or the local building department.
What does a good drain hose route look like?
A good route is gentle and supported. The hose should run without sharp bends, without being pinched by the cabinet, the drawer frame or a pipe, and without sagging where water could sit. If your installation uses a high loop, the loop should stay raised and secured, not slump down over time. The hose should not be stretched tight, because a hose under tension can kink at the fitting, and it should not be so long that it coils and traps water.
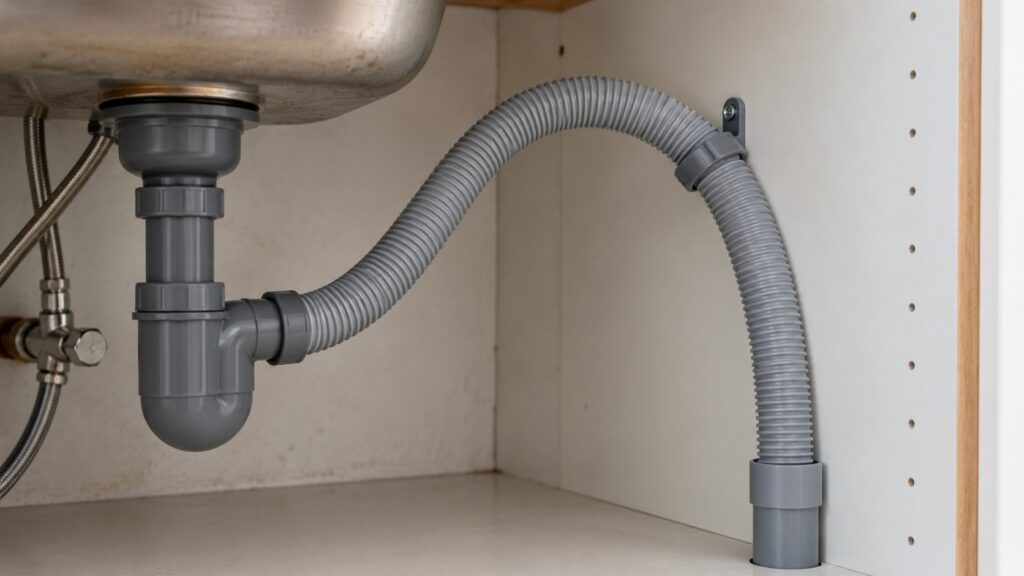
Look at the route in daylight before the drawer is pushed into place, and again after the first test cycle. Check that the hose has not shifted when the drawer was seated. A hose that looked fine before the unit slid in can end up pinched behind it. Our troubleshooting page for a dishwasher that will not drain and our guide to not draining troubleshooting cover what to do if water stays in the drawer after the first cycle.
How does the water supply connect?
The supply line runs from a water shut-off valve, usually under the adjacent sink, to the drawer’s inlet. Our requirements guide makes the general point that the valve has to be within reach of the supply hose that comes with the unit, so confirm that against the DishDrawer instructions before delivery day. The valve lets you shut the water off for service, so label it and make sure it works freely. Tighten the fittings snugly and no more: overtightening can crack a valve or a fitting and cause a slow leak, which may not show for days.
After the connection is made, open the valve slowly and look at every joint. Run a first cycle with the cabinet floor visible if you can, and watch the supply and drain joints during the fill and drain stages. A slow drip usually shows itself early. If you find one, close the valve and fix it before loading dishes.
What should you leave to the installer?
The water and drain hookup involves the household plumbing, and the electrical connection involves the household wiring, so both are work for a qualified installer, especially when the drawer sits in a finished kitchen. Do not open the drawer’s panels, reach into the pump area or alter the wiring to improve a connection. If you are replacing an older unit, do not reuse worn hoses without having them checked.
Do not work under the sink with the drawer powered. If water ever reaches an outlet, a plug or the wiring, switch the breaker off at the panel while standing on a dry floor, and never pull a plug from a wet outlet. Then call a professional. We are an independent repair company, not the manufacturer, and we can help with a leak or a drainage problem after the installation. Our dishwasher flood page explains what a flood message means, and our dishwasher repair page explains how a visit works.
What should you check after the first cycle?
Run the first cycle with the drawer empty and watch it from start to finish. Check that the drawer fills, washes and drains, that no water pools under the cabinet and that the drawer opens and closes without catching the hose. Look again after a day, because a loose fitting can weep slowly. If something looks wrong, stop using the drawer and schedule a visit. Keep the installation instructions with the model information, so that a technician does not have to guess.